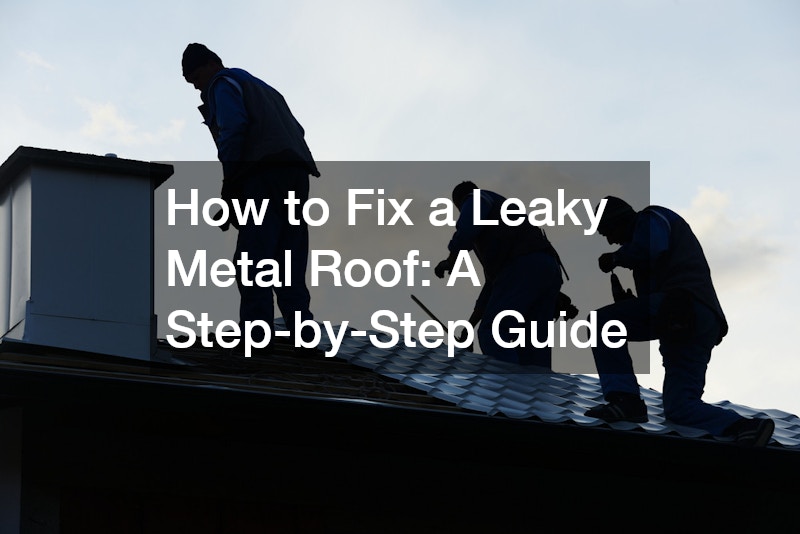
Metal roofs are popular for their durability, longevity, and energy efficiency. However, like any roofing material, they can develop leaks over time, leading to potential damage to your home’s interior and structure. If you notice water stains, damp spots, or rust on your metal roof, it’s crucial to address these issues promptly. In this article, we’ll guide you through the process of identifying the causes of leaks and provide a detailed step-by-step guide on how to fix a leaky metal roof.
Understanding the Causes of Metal Roof Leaks
Before diving into repairs, it’s essential to understand the common causes of leaks in metal roofs. Identifying the source of the problem can help you make more effective repairs and prevent future issues.
1. Corrosion
Metal roofs, while durable, are susceptible to corrosion, particularly if they are made from materials such as steel. Corrosion typically occurs when the protective coating of paint or galvanization that shields the metal from moisture and oxygen begins to degrade. Environmental factors such as rain, humidity, and the presence of pollutants can accelerate this process.
Corrosion can manifest as rust spots or pits on the roof surface. Over time, these imperfections can evolve into small holes or weak areas where water can penetrate. Once a metal roof starts to corrode, it can compromise the integrity of the entire roof system, leading to larger leaks and more extensive damage. Regular inspections and maintenance, including touch-ups of the protective coating, can help mitigate this risk.
2. Improper Installation
The installation of a metal roof is critical to its longevity and performance. If the roof is not installed correctly, it may have various deficiencies, such as misaligned panels, gaps between seams, or loose screws. These installation errors can create pathways for water to infiltrate, especially during heavy rain or storms.
Additionally, using incorrect fasteners or materials that are not compatible with the specific type of metal can exacerbate these issues. Proper installation requires adherence to industry best practices and manufacturer guidelines to ensure that the roof can withstand environmental stresses. If you’re unsure about the installation quality, consider hiring a professional to assess and correct any issues.
3. Flashing Issues
Flashing is an essential component of a metal roofing system, acting as a barrier to redirect water away from vulnerable areas such as chimneys, vents, skylights, and where two roofing surfaces meet. It is typically made from metal materials that match the roof, such as aluminum or galvanized steel.
Improperly installed or damaged flashing can lead to significant water entry points. For instance, if the flashing is not securely fastened or if the seams are not properly sealed, water can seep behind the flashing and into the roofing structure. Regularly inspect the flashing during roof maintenance to check for signs of deterioration, such as rust or gaps, and replace or reseal it as needed to maintain a watertight seal.
4. Worn Seals
Seals around roof penetrations—such as vents, pipes, and skylights—are critical to preventing leaks. Over time, exposure to sunlight, extreme temperatures, and weather conditions can cause these seals to wear out or crack. This is particularly common in areas that experience significant thermal expansion and contraction.
Once these seals fail, water can easily infiltrate the roofing system, leading to leaks and potential damage to the underlying structure. It’s important to periodically inspect these areas and replace any worn or damaged seals promptly. A quality sealant should be used, as this can help ensure that these vulnerable points remain secure against water entry.
5. Condensation
In colder climates, condensation can become a significant issue for metal roofs. When warm, moist air rises and comes into contact with the cooler metal surface, it can condense into water droplets. If proper ventilation is not provided in the attic or roof space, this moisture can accumulate over time, leading to leaks and even promoting mold growth.
Proper insulation and ventilation are critical in preventing condensation issues. Installing ridge vents, soffit vents, and ensuring an airflow path can help reduce humidity levels beneath the roof, preventing condensation from forming in the first place.
6. Ice Dams
Ice dams are a common problem in colder regions where heavy snow accumulates on a roof. When the snow on the roof melts due to heat escaping from the house, the water can flow down to the eaves where it refreezes, forming a dam. This can trap water behind the dam, causing it to back up under the roof covering and leading to leaks.
To prevent ice dams, it is essential to maintain proper attic insulation and ventilation. Insulation will help keep the roof surface cold, preventing snow melt, while ventilation will help expel warm air from the attic, reducing the chances of ice formation. In severe cases, using roof rakes to remove snow accumulation can also be effective.
7. Mechanical Damage
Mechanical damage refers to physical harm caused to a metal roof from external forces, including heavy winds, hail, or falling debris such as branches or other objects. Such damage can compromise the roof’s integrity, leading to dents, punctures, or dislodged panels.
Even seemingly minor dents can weaken the roof and create potential leak points. Regularly inspect your roof for signs of mechanical damage, especially after severe weather events. If damage is detected, it’s important to address it immediately, either by repairing the affected area or replacing the damaged panels to ensure the roof remains watertight.
Step-by-Step Guide to Fixing a Leaky Metal Roof
Now that you understand the causes of leaks, let’s go through the steps to fix a leaky metal roof effectively.
Step 1: Safety First
Before starting any repairs, ensure your safety:
- Wear Proper Gear: Use non-slip shoes, gloves, and a safety harness if working on a steep roof.
- Use Proper Ladders: Ensure your ladder is stable and tall enough to reach the roof without overreaching.
- Check the Weather: Avoid working on the roof during wet or windy conditions.
Step 2: Identify the Source of the Leak
To fix a leaky metal roof, you first need to locate the leak. Here’s how to do it:
- Inspect the Interior: Look for water stains, damp spots, or mold on ceilings and walls. Trace these spots back to their source on the roof.
- Examine the Roof Surface: From the roof, look for rust spots, damaged areas, or loose screws. Pay close attention to seams, flashing, and roof penetrations.
- Use a Hose Test: If you can’t find the leak visually, ask a helper to run a hose over sections of the roof while you check the interior for leaks.
Step 3: Gather Your Materials and Tools
Once you’ve identified the leak, gather the necessary materials and tools:
- Materials:
- Metal roof sealant
- Replacement screws or fasteners
- Roof flashing (if needed)
- Rust-inhibiting primer (if dealing with rust)
- Patch material (for larger holes)
- Fiberglass mesh tape (for reinforcing patches)
- Tools:
- Screwdriver or drill
- Caulking gun
- Wire brush or sandpaper
- Safety goggles
- Ladder
- Measuring tape
- Utility knife
Step 4: Clean the Area
Before making repairs, clean the area around the leak to ensure a good seal:
- Remove Debris: Clear any leaves, dirt, or debris from the roof surface.
- Clean Rust Spots: If you find rust, use a wire brush or sandpaper to remove it. If necessary, apply a rust-inhibiting primer to prevent further corrosion.
Step 5: Repairing Small Holes and Rust Spots
For minor leaks, follow these steps:
- Seal Small Holes: Apply metal roof sealant directly over the hole. Use a putty knife to spread it evenly, ensuring it covers the area completely.
- Patch Larger Holes: If the hole is too large for sealant:
- Cut a patch from a piece of metal that matches your roof.
- Apply sealant around the edges of the hole.
- Place the patch over the hole and secure it with screws, ensuring the screws are well sealed with sealant to prevent future leaks.
- Cover the edges of the patch with additional sealant for a watertight seal.
Step 6: Fixing Flashing Issues
If you identify problems with the flashing, follow these steps:
- Inspect Flashing: Look for cracks, gaps, or signs of damage around chimneys, vents, or skylights.
- Reattach Loose Flashing: If the flashing is loose, reattach it using screws or sealant as needed.
- Replace Damaged Flashing: If the flashing is significantly damaged, it may need to be replaced. Remove the old flashing and install new flashing, securing it tightly and sealing all edges with metal roof sealant.
Step 7: Inspect and Replace Screws
Loose or damaged screws can also cause leaks:
- Tighten Loose Screws: Use a drill or screwdriver to tighten any loose screws.
- Replace Damaged Screws: If screws are rusted or stripped, replace them with new ones. Be sure to apply sealant around the screw holes before tightening to create a watertight seal.
Step 8: Check for Condensation Issues
If your metal roof is prone to condensation, ensure proper ventilation:
- Improve Ventilation: Ensure your attic has adequate ventilation to allow for airflow. Consider adding vents if necessary.
- Insulate the Attic: Proper insulation can help prevent condensation from forming on the underside of the metal roof.
Step 9: Monitor Ice Dams
If you live in an area prone to ice dams, take the following precautions:
- Inspect Eaves: Regularly check the eaves and gutters for ice buildup and clear them when necessary.
- Consider Heat Cables: Installing heat cables can help prevent ice from forming on the edges of the roof.
Step 10: Final Inspection
Once you’ve completed the repairs:
- Conduct a Final Inspection: Look over the repaired areas and ensure all seams and penetrations are properly sealed.
- Monitor for Future Leaks: After rainfall or snow melt, check the interior for any signs of leaks and address them promptly.
Step 11: Regular Maintenance
To prevent future leaks and extend the lifespan of your metal roof, consider the following maintenance tips:
- Clean the Roof Regularly: Remove debris, leaves, and dirt from the roof surface to prevent moisture buildup and rust.
- Inspect Regularly: Check your roof at least twice a year for signs of wear and tear, especially after severe weather.
- Address Issues Promptly: Don’t wait for small problems to become significant leaks. The sooner you address them, the less costly the repairs will be.
Additional Repair Techniques and Tips
Using a Silicone Sealant
Silicone sealants are excellent for roofing repairs due to their flexibility and waterproof properties. Here’s how to use it:
- Prepare the Surface: Clean the area thoroughly to ensure the sealant adheres well.
- Apply the Sealant: Using a caulking gun, apply a generous amount of silicone sealant over the leak and surrounding area. Smooth it out with a putty knife for even coverage.
- Let It Cure: Allow the sealant to cure according to the manufacturer’s instructions before exposing it to water.
Applying a Roof Coating
For added protection, consider applying a roof coating:
- Choose the Right Coating: Select a coating specifically designed for metal roofs. These products can provide additional waterproofing and UV protection.
- Application: Use a roller or sprayer to apply the coating evenly over the entire roof surface, focusing on seams and joints. Follow the manufacturer’s instructions for drying times and application techniques.
Reinforcing with Fiberglass Mesh Tape
For areas prone to frequent leaks, using fiberglass mesh tape can provide added support:
- Cut the Tape: Measure and cut a length of fiberglass mesh tape to cover the area.
- Apply Sealant: Place the tape over the repair area and apply a layer of metal roof sealant over it. This adds strength and prevents further cracking or peeling.
Hiring a Professional
If the leaks persist despite your repairs or if the damage is extensive, it may be time to hire a professional roofing contractor:
- Get Multiple Quotes: Contact several roofing contractors to get quotes and assess their experience with metal roofs.
- Check References: Ensure the contractor has good reviews and references from previous customers.
Conclusion
Fixing a leaky metal roof can seem daunting, but with the right tools and techniques, you can successfully address the issue yourself. Regular maintenance and prompt repairs can help you prolong the life of your roof and protect your home from water damage. Always prioritize safety and don’t hesitate to reach out for professional help if needed. With diligence and care, your metal roof can remain a durable, reliable barrier against the elements for years to come.